Installing Kubernetes Homelab Tools for Development and Deploying a Sample Application Using a Jenkins Pipeline
Walkthrough for installing Jenkins through configuration-as-code, MetalLB, Longhorn, the Kubernetes dashboard, and the Kubernetes metrics server using Ansible.
This is part 4 of a multi-part series where we continue building off of the previous parts. To catch up to where we are at check out the previous walkthroughs:
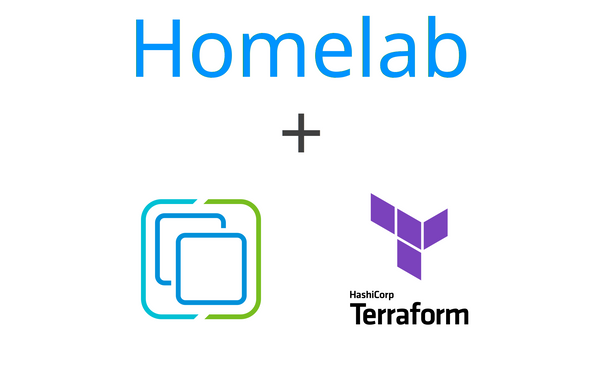
- Using VMWare ESXi 8 and vCenter 8 in your homelab for free - part 1
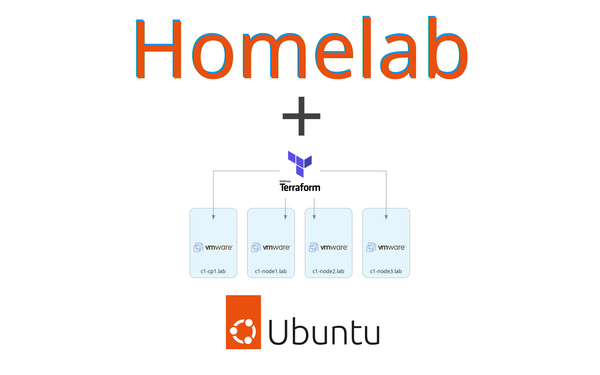
- Creating VMs for Kubernetes using Terraform and VMWare vSphere - part 2
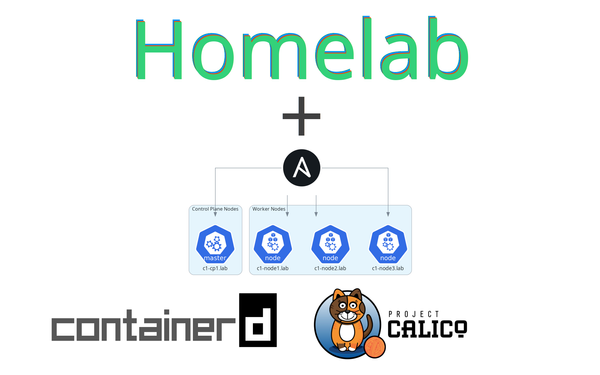
- Installing your Kubernetes homelab cluster in minutes with Ansible - part 3
The goal of this series
This series is for you if you are interested in making management of your homelab something more turn-key. It is also for you if you are looking for something to help get hands-on experience to move from hobby tinkering to tools used in the workplace for managing infrastructure like Kubernetes clusters.
The series is an end-to-end walkthrough from installing ESXi on bare metal up to having homelab tools (Jenkins, Kubernetes dashboard) running in a Kubernetes cluster using infrastructure as code practices to allow you to spin up and manage this whole setup through terraform and ansible.
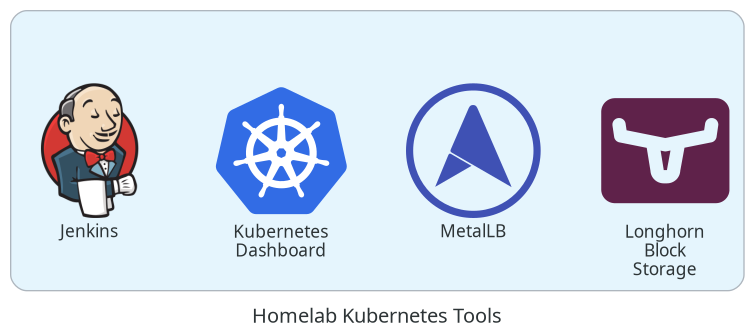
The end-state Kubernetes cluster we will be creating will have some developer-focused tools deployed which will be described in more detail in part 4. All tools are deployed from code.
Series Notes
To keep this series managable, I will skip over basics of why and how to use tools like terraform and ansible - this series will jump right in using the tools. If you are coming without a basic understanding of those tools, I would suggest running through some tutorials. There are fantastic write ups for those elsewhere.
This is a walkthrough that is meant to be adapted to your network design and hardware. It is best suited for those that have a single homelab machine where ESXi will be installed directly on the hardware and a vCenter instance will be started up within the ESXi host. Also, it should go without needing to say it, but this is not production grade - things like valid tls certificates are not included.
This guide
By the end of this guide, you will have a Jenkins instance running that includes a basic pipeline that will run as an ephemeral pod in your Kubernetes cluster that will build a basic golang application from sourcecode, create a container with the go app using buildah, publish the application to a container registry, and then deploy the application to your homelab using a helm chart. This application will be made accessible to your network using MetalLB. The Jenkins instance will be backed by highly available persistance storage using Longhorn.
Guide
Get companion code
The code this guide uses is available at https://github.com/markperdue/homelab-ansible. Clone the companion code repo to have the best experience following along.
The Ansible Playbook
I have provided an ansible playbook that will install and configure all the homelab tools. This is what the companion code repo mentioned before is.
The main configuration file is inventory/group_vars/all.yaml. This file outlines some of the configuration I would expect users of this playbook might want to change over time as you get familiar with the tools. Outside of the dummy credential values you should change, the default values should generally work but let's go over them.
The configuration file and the default values are as follows:
metallb:
  address_pool: 192.168.2.240-192.168.2.250
jenkins:
  admin_username: admin
  admin_password: changethisP455word!
  load_balancer_ip: 192.168.2.240
  install_plugins:
    - configuration-as-code:1569.vb_72405b_80249            # https://plugins.jenkins.io/configuration-as-code/
    - git:5.0.0                                             # https://plugins.jenkins.io/git/
    - job-dsl:1.81                                          # https://plugins.jenkins.io/job-dsl/
    - kubernetes:3852.v41ea_166a_ed1b_                      # https://plugins.jenkins.io/kubernetes/
    - kubernetes-credentials-provider:1.209.v862c6e5fb_1ef  # https://plugins.jenkins.io/kubernetes-credentials-provider/
    - pipeline-stage-view:2.31                              # https://plugins.jenkins.io/pipeline-stage-view/
    - workflow-aggregator:590.v6a_d052e5a_a_b_5             # https://plugins.jenkins.io/workflow-aggregator/
docker_hub:
  username: my_user
  password: my_password
kubernetes_dashboard:
  load_balancer_ip: 192.168.2.241
  manifest_url: https://raw.githubusercontent.com/kubernetes/dashboard/v2.7.0/aio/deploy/recommended.yaml
longhorn:
  load_balancer_ip: 192.168.2.242
metrics_server:
  enabled: true
Let's break down that configuration section by section
MetalLB
metallb:
  address_pool: 192.168.2.240-192.168.2.250
Set this to a range of IPs available on your network that you would like MetalLB to allocate IPs from. Make sure the IPs in this range do not coincide with any IPs in any DHCP servers on your network. Since we are only creating a handful of services in this tutorial, the default range I included is very conservative and includes only 11 IPs. Feel free to change this to a larger or smaller values as needed.
Jenkins
jenkins:
  admin_username: admin
  admin_password: changethisP455word!
Update admin_username and admin_password with a good password for logging into Jenkins with.
jenkins:
  load_balancer_ip: 192.168.2.240
The value set here will be passed through to the Jenkins helm chart that will be installed later. That chart will create a Kubernetes service of type LoadBalancer with the IP defined here. If you changed the address_pool value earlier for MetalLB, update load_balancer_ip to a value within that range, otherwise keeping it as the default should be fine.
jenkins:
  install_plugins:
    - configuration-as-code:1569.vb_72405b_80249            # https://plugins.jenkins.io/configuration-as-code/
    - git:5.0.0                                             # https://plugins.jenkins.io/git/
    - job-dsl:1.81                                          # https://plugins.jenkins.io/job-dsl/
    - kubernetes:3852.v41ea_166a_ed1b_                      # https://plugins.jenkins.io/kubernetes/
    - kubernetes-credentials-provider:1.209.v862c6e5fb_1ef  # https://plugins.jenkins.io/kubernetes-credentials-provider/
    - pipeline-stage-view:2.31                              # https://plugins.jenkins.io/pipeline-stage-view/
    - workflow-aggregator:590.v6a_d052e5a_a_b_5             # https://plugins.jenkins.io/workflow-aggregator/
These are the Jenkins plugins to be installed when we run the playbook. To follow the remainder of this guide, keep at least these plugins listed. If you would like additional plugins to be installed, add them to the list in the format - <plugin name>:<plugin version> with the exact name listed on https://plugins.jenkins.io/.
To keep your instance following good practices for config-as-code it is best to regularly update the versions of the plugins as they become available in inventory/group_vars/all.yaml and then rerunning the playbook as opposed to updating the plugins in the Jenkins UI. By doing it this way, we keep our configuration the source of truth for what is installed.
Docker Hub
The Jenkins instance that will be created when we run the playbook will have a demo pipeline showcasing a way of building container images, and publishing them to a container registry. If you would like to fully utilize that pipeline, please update the docker_hub section with credentials for a docker hub account. You can create a free account at https://hub.docker.com/. If you do not change these to valid credentials, things will still work except for one feature in the demo pipeline.
docker_hub:
  username: my_user
  password: my_password
Kubernetes Dashboard
Everyone likes a good dashboard. Let's install the standard Kubernetes Dashboard to help us poke around our cluster.
kubernetes_dashboard:
  load_balancer_ip: 192.168.2.241
  manifest_url: https://raw.githubusercontent.com/kubernetes/dashboard/v2.7.0/aio/deploy/recommended.yaml
The two options to configure here are the desired load balancer IP and the manifest of the kubernetes dashboard to install. Keeping these as the defaults should be fine. Of course, if you changed the MetalLB address pool value earlier, update the load_balancer_ip value.
As of writing, the latest Kuberenetes dashboard is 2.7.0 but if there is a new version, replacing the manifest_url with the latest version should have a good chance of working. The latest version should be listed at https://kubernetes.io/docs/tasks/access-application-cluster/web-ui-dashboard/
Longhorn
For our persistance storage option in Kubernetes we will be installing Longhorn. Earlier in part 2, we created each of our VMs with an additional mount point that Longhorn will use for highly available persistance in our cluster. If you have followed the previous guides, all of this will be taken care of automatically and the only thing needed to be configured before we run the playbook is the load_balancer_ip. The default value is likely fine unless you changed like the MetalLB address_pool value earlier.
longhorn:
  load_balancer_ip: 192.168.2.242
Kubernetes Metrics Server
The Kubernetes Metrics Server is a nice little service to have available in our homelab to allow us to do CPU and memory based horizontal autoscaling. Nothing in this tutorial uses this Kubernetes feature but the playbook will install it anyways as it is a pretty helpful service to have available.
metrics_server:
  enabled: true
If you do not want the metrics server installed, set the enabled value to false
Install Homelab Tools
Now it is time to install our homelab tools.
- Open a terminal and navigate to the folder where the companion code was checked out to
- Install the playbook's prerequisites with
ansible-galaxy install -r requirements.yaml - Run
ansible-playbook -i inventory/dev playbooks/all.yaml --user appuser
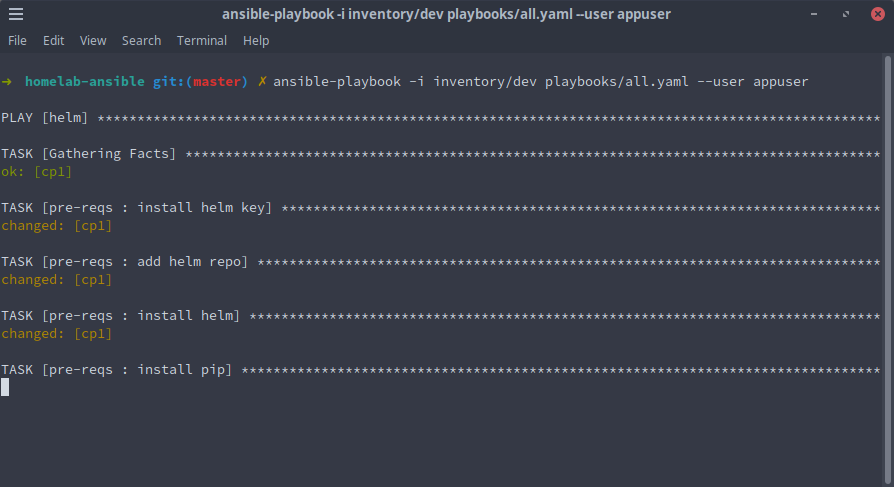
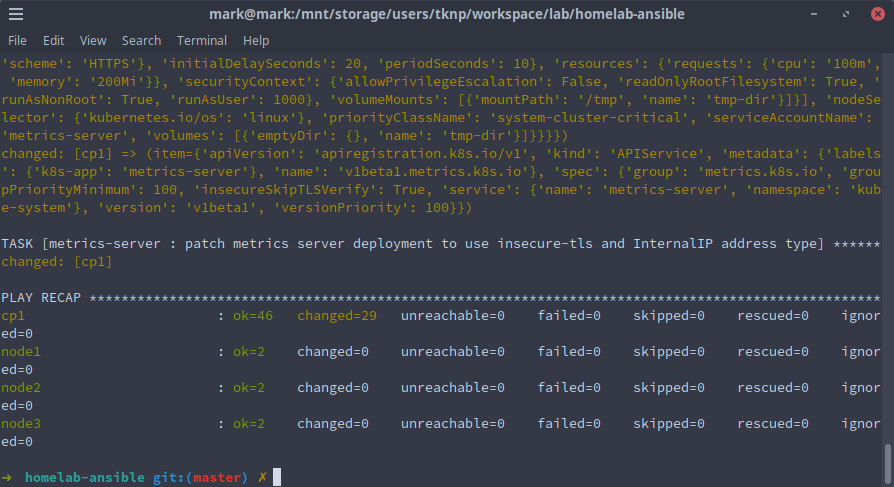
That's it! After a few minutes the playbook should run through and all our tools should be available for use.
Let us take a look and see what we have.
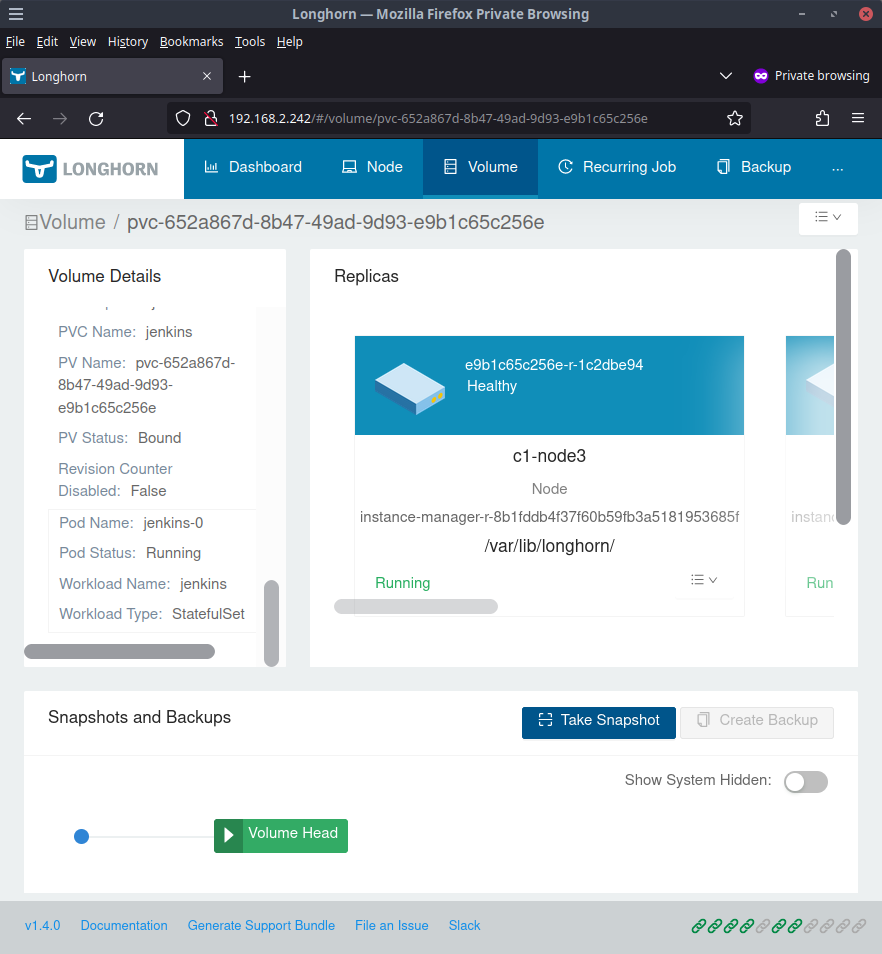
Longhorn UI
The UI for longhorn should now be available at http://192.168.2.242
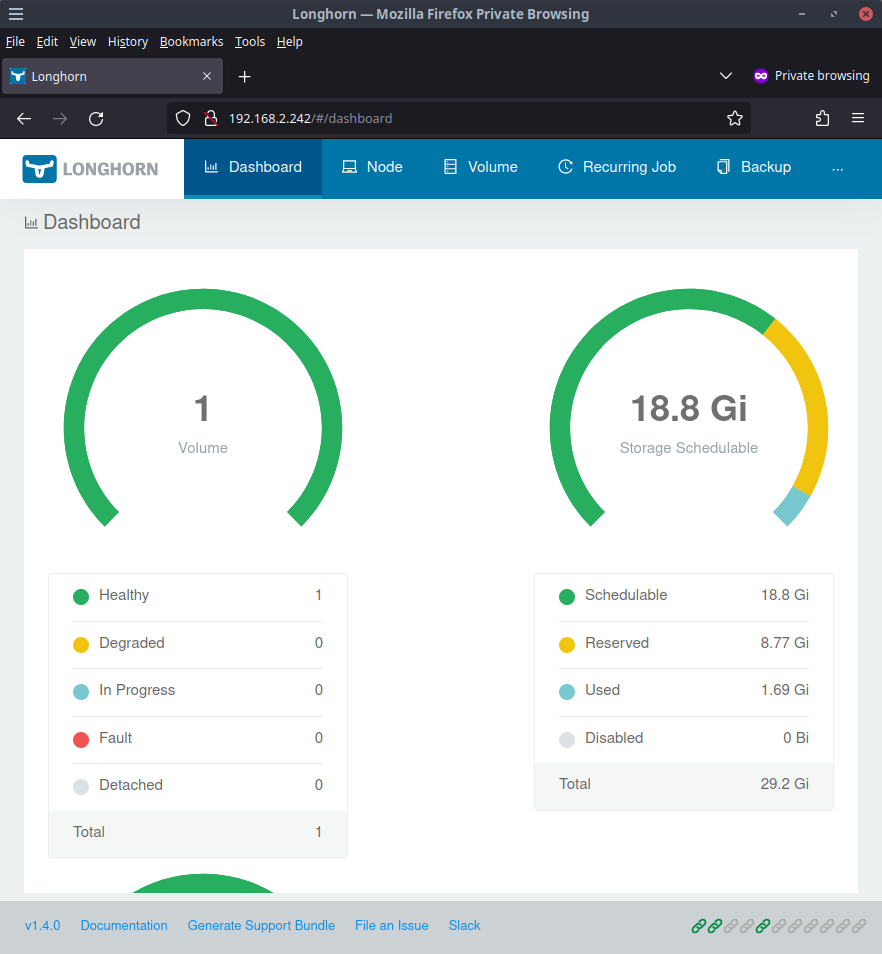
Clicking on the Healthy listing will show all the volumes that Longhorn is managing. In our case, only 1 volume will be shown for our Jenkins instance.
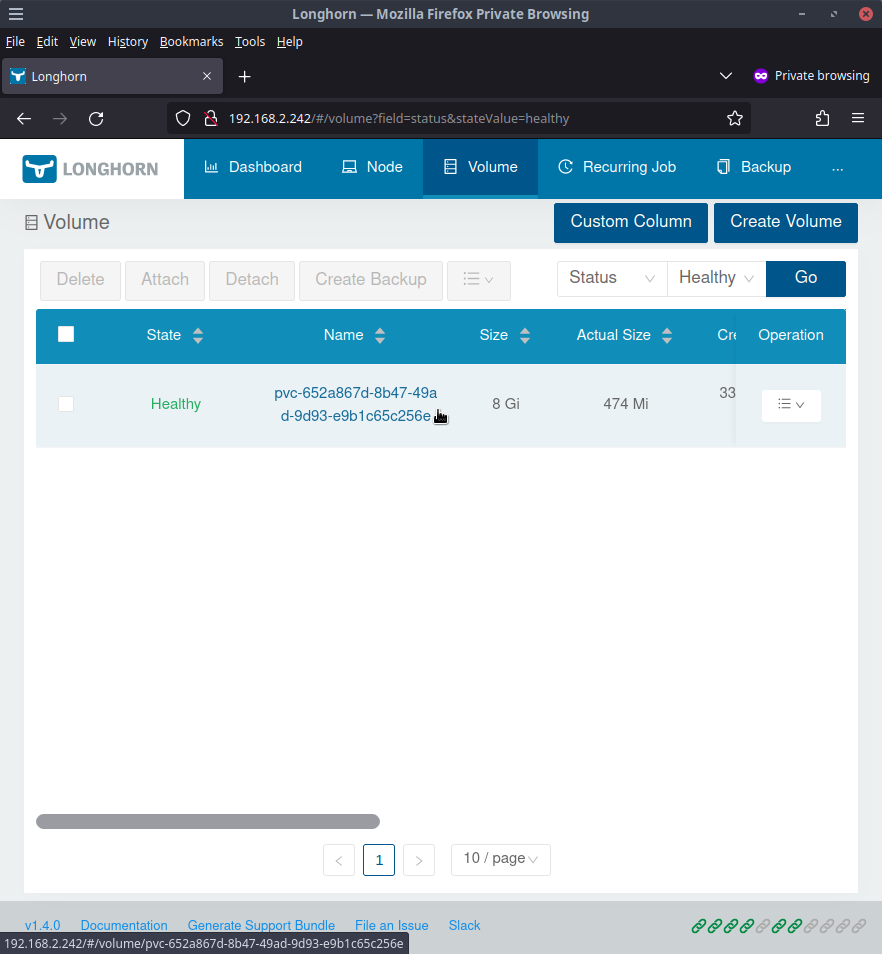
Clicking the volume name will take us to volume details where we can see that this volume is for our Jenkins deployment so that things like our build history and Jenkins configuration can survive things like pod restarts amongst other things.
Kubernetes Dashboard UI
The Kubernetes Dashboard should load up at http://192.168.2.241
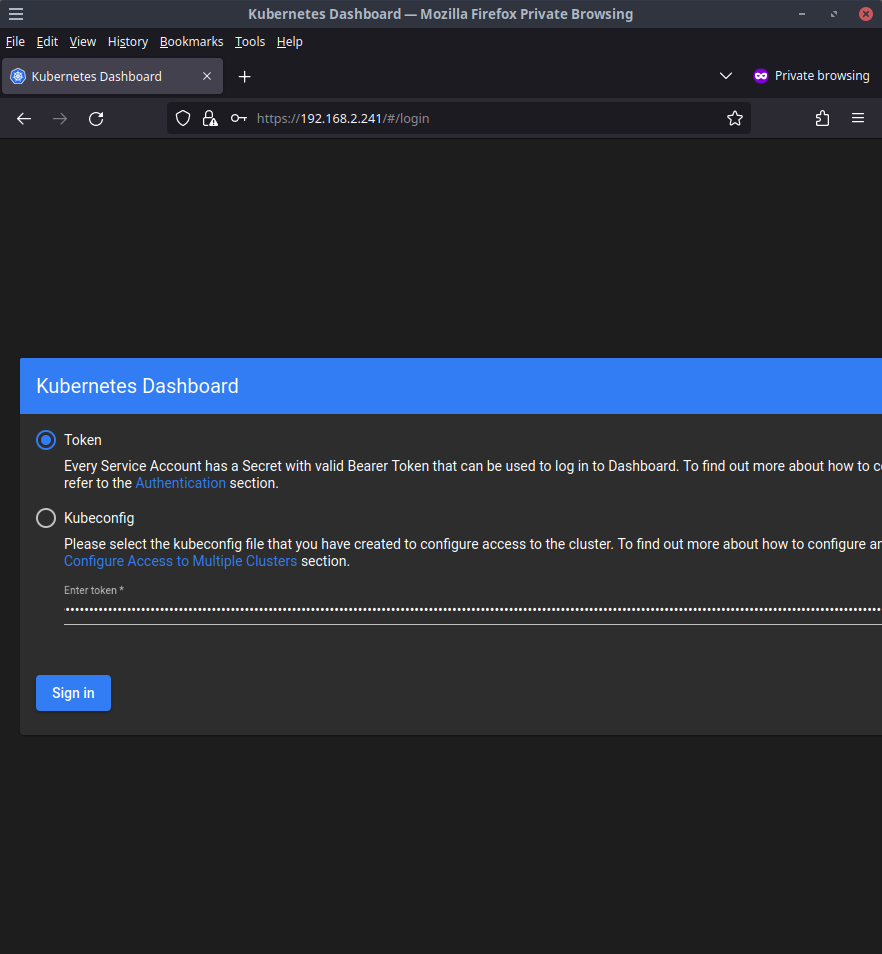
Click Token and for the Enter token * input, paste in the base64 decoded string shown in the Ansible playbook output. Do not worry if you cleared the console history as we can easily retrieve this token by running the following command after sshing into one of our Kubernetes nodes that has kubectl installed like c1-cp1.lab
ssh [email protected]
k -n kubernetes-dashboard get secret admin-user --template={{.data.token}} | base64 -d
Copy that value and paste it in to login and you will be taken to the dashboard.
Jenkins
Launch http://192.168.2.240 and the Jenkins login screen should show up.
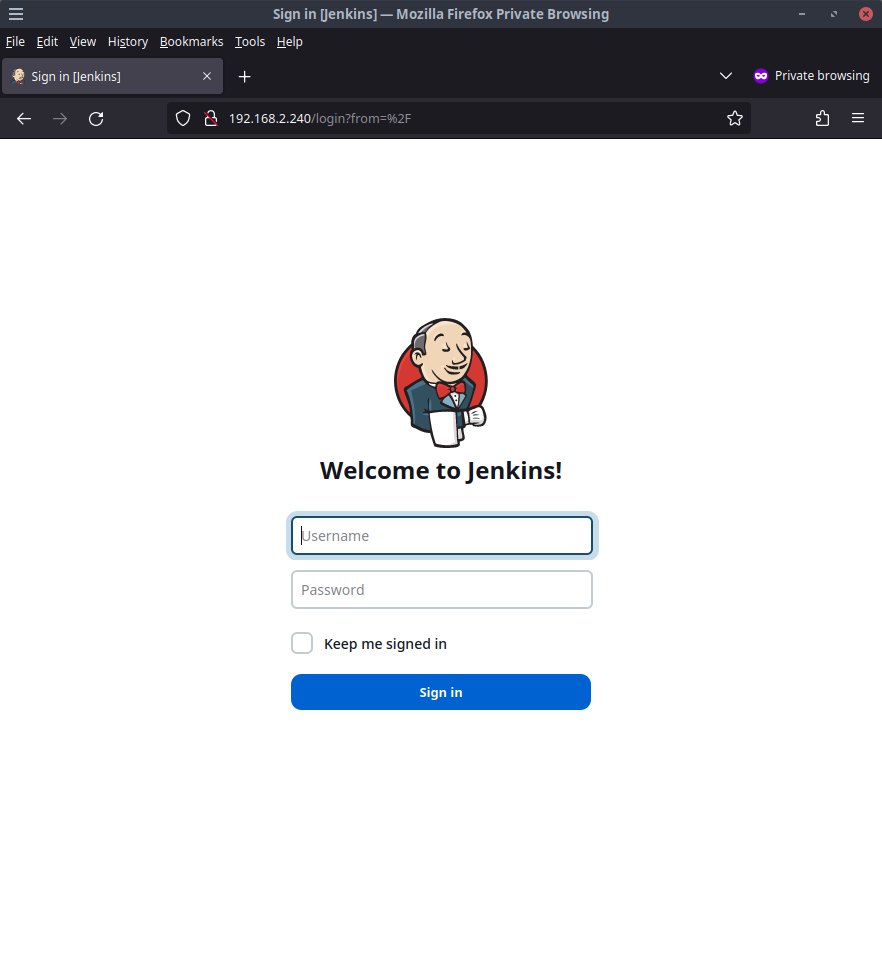
Login with the values you modified earlier or use the default username admin and password changethisP455word!
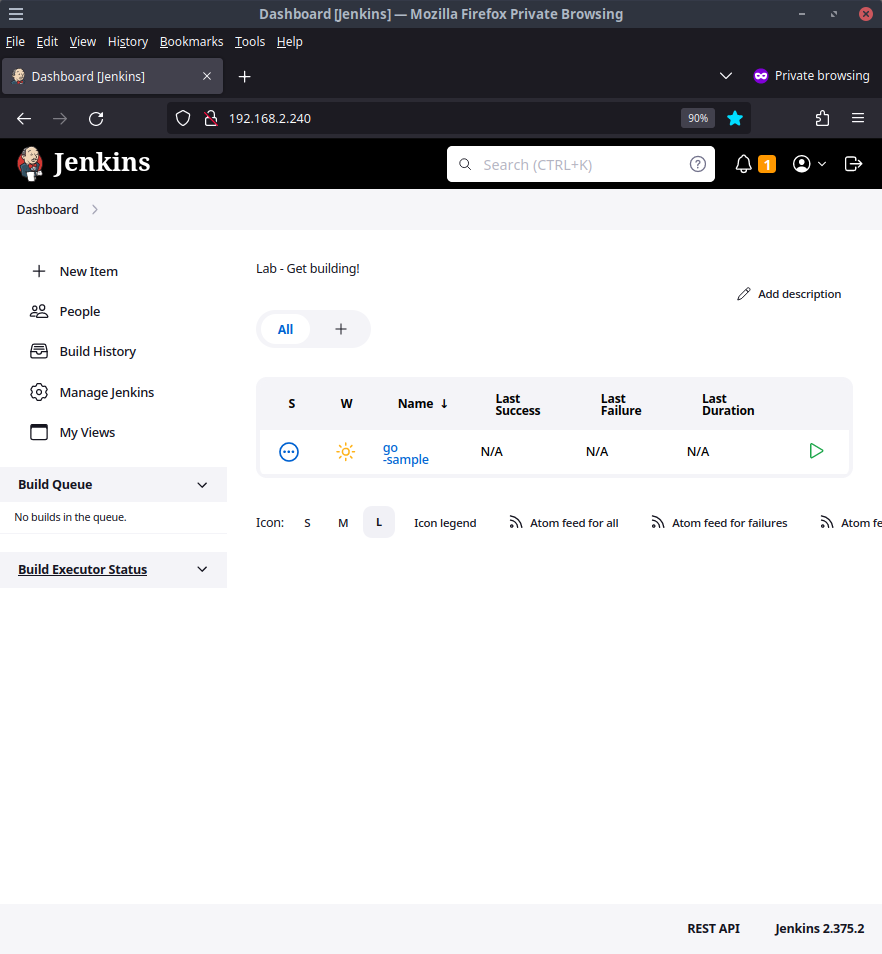
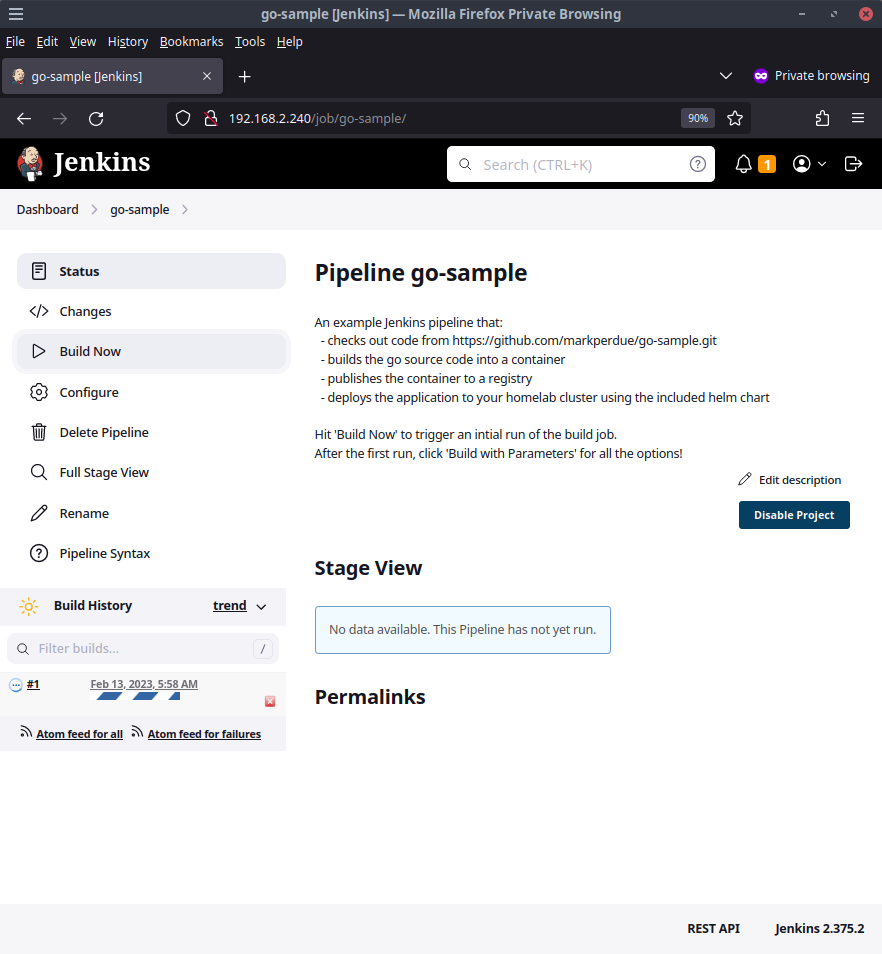
Welcome to your Jenkins instance built from config as code. On the main page you'll see the go-sample pipeline I have added as a demo. Before we explore that job, let's check out a few other things the instance has.
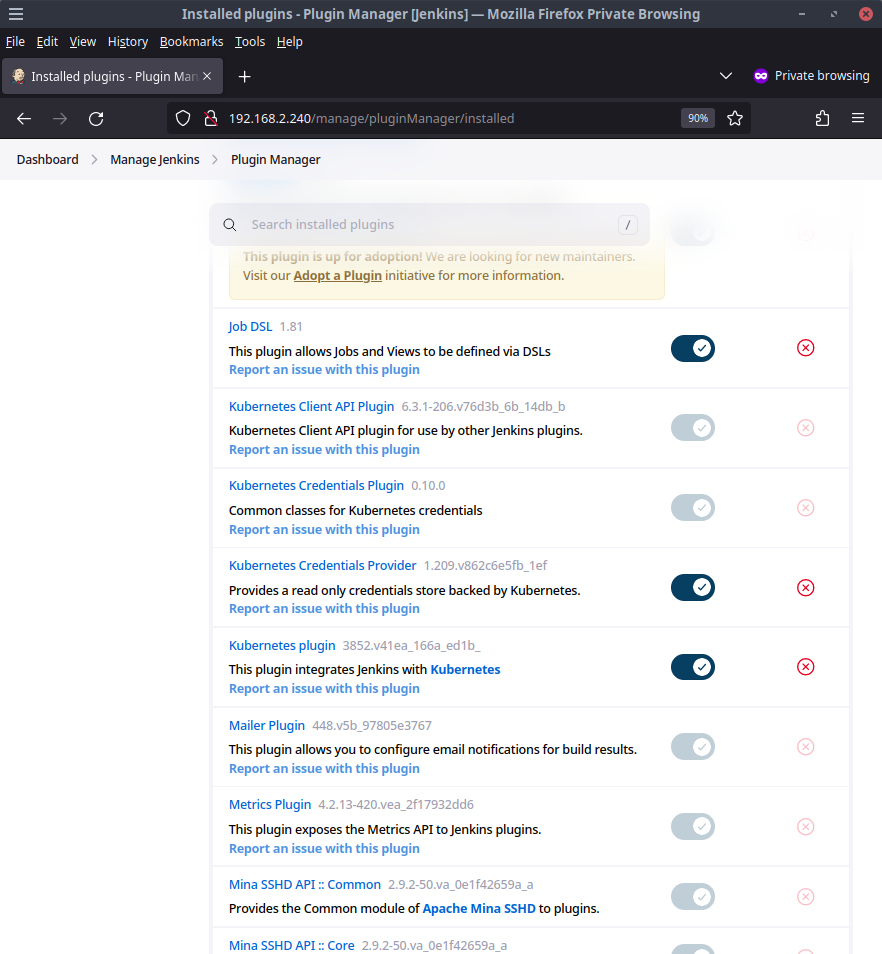
Checking out the installed plugins page under Manage Jenkins > Manage Plugins > Installed Plugins should show all the default Jenkins plugins as well as the ones defined in our Ansible config like the Job DSL, Kubernetes Credentials Plugin, and the others.
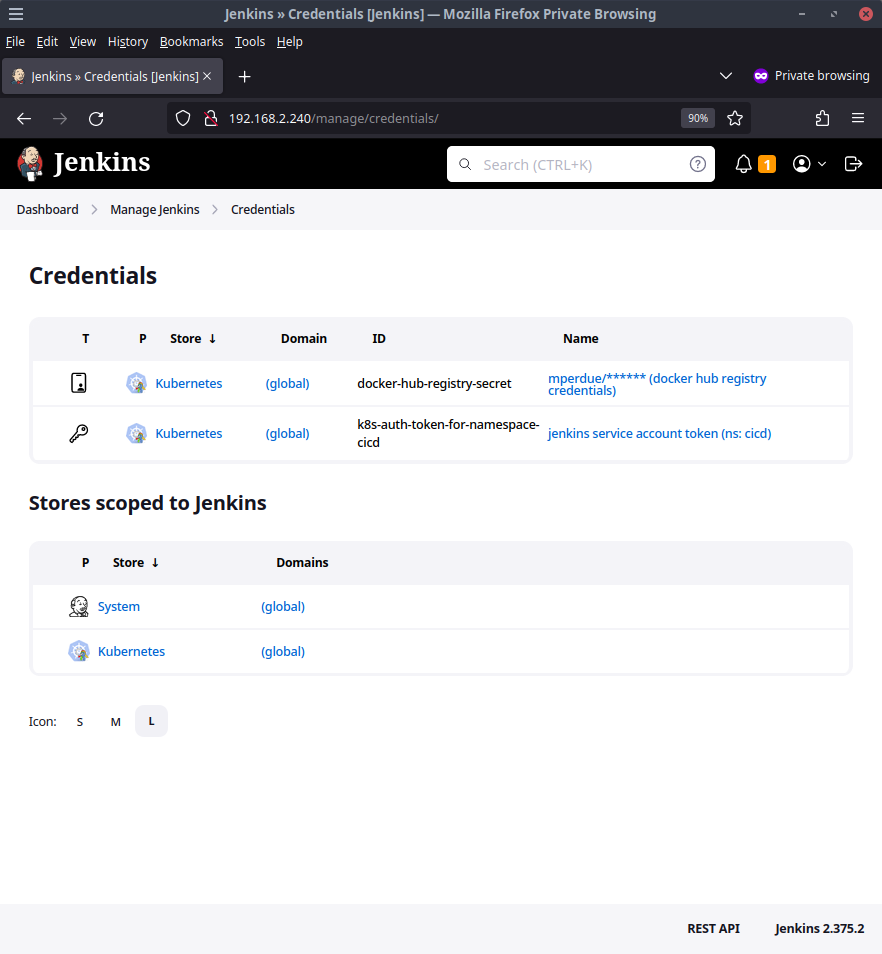
Speaking of credentials, the Kubernetes credentials plugin we installed through Ansible should have led to the creation of a few Jenkins credentials we should see listed at http://192.168.2.240/manage/credentials/. The go-sample pipeline will use these credentials to do work which we will see shortly.
Start a build
Click into the go-sample buildjob within Jenkins and click Build Now to trigger the first run of this pipeline.
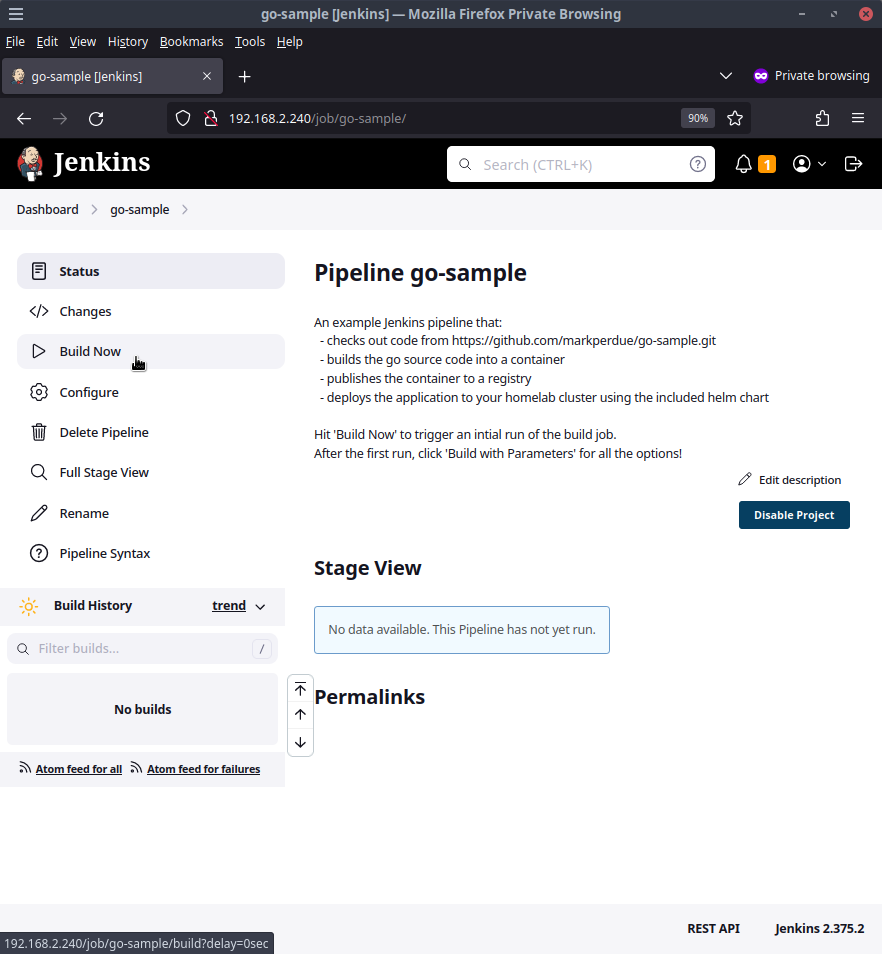
This pipeline will check out a git repo I created at https://github.com/markperdue/go-sample which has a very basic golang app that starts up a webserver on port 8080 and displays a Hello World! message. The git repo also includes the Jenkins pipeline our buildjob is going to run.
pipeline {
  parameters {
    string(name: 'image', description: 'name of the container image to build (including the container registry prefix)', defaultValue: 'docker.io/mperdue/go-sample')
    booleanParam(name: 'build', description: 'enable to build the sample app as a container image', defaultValue: false)
    booleanParam(name: 'publish', description: 'enable to publish the sample container image to a container registry\n(requires build stage to be enabled)', defaultValue: false)
    booleanParam(name: 'deploy', description: 'enable to deploy the sample container image using the sample helm chart\n(requires both build and publish stages to be enabled)', defaultValue: false)
    credentials(name: 'credential', description: 'if publish stage is enabled, select a credential to be used for authorizing to the container registry', defaultValue: '', credentialType: "Username with password", required: false )
  }
  agent {
    kubernetes {
      cloud 'cicd'
      serviceAccount 'jenkins'
      yaml '''
        kind: Pod
        spec:
          securityContext:
            runAsUser: 1000
          containers:
            - name: buildah
              image: quay.io/buildah/stable
              imagePullPolicy: IfNotPresent
              command: ["cat"]
              tty: true
              securityContext:
                privileged: true
            - name: helm
              image: docker.io/alpine/helm:3.10.2
              imagePullPolicy: IfNotPresent
              command: ["cat"]
              tty: true
            - name: kubectl
              image: docker.io/bitnami/kubectl
              imagePullPolicy: IfNotPresent
              command: ["cat"]
              tty: true
        '''
    }
  }
  options {
    skipDefaultCheckout true
  }
  environment {
    //  example value only. generally set to something determined from code/source control
    version = '0.1.1'
  }
  stages {
    stage('checkout') {
      steps {
        git url: 'https://github.com/markperdue/go-sample.git'
      }
    }
    stage('build') {
      when { expression { return params.build.toBoolean() } }
      steps {
        container(name: 'buildah') {
          sh "buildah bud -f Dockerfile -t ${params.image}:${version} --build-arg 'version=${version}' ."
        }
      }
    }
    stage('publish') {
      when { expression { return params.publish.toBoolean() } }
      steps {
        container(name: 'buildah') {
          withCredentials([usernameColonPassword(credentialsId: credential, variable: 'creds')]) {
            sh 'buildah push --creds ' + creds + " ${params.image}:${version} docker://${params.image}:${version}"
          }
        }
      }
    }
    stage('deploy') {
      when { expression { return params.deploy.toBoolean() } }
      steps {
        container(name: 'helm') {
          sh "helm upgrade --install go-sample ./helm --set 'image.repository=${params.image}' --set 'image.tag=${version}' -n cicd --wait"
        }
      }
    }
    stage('validate') {
      when { expression { return params.deploy.toBoolean() } }
      steps {
        container(name: 'kubectl') {
          script {
            String url = sh returnStdout: true, script: "kubectl get svc --namespace cicd go-sample --template '{{ range (index .status.loadBalancer.ingress 0) }}{{.}}{{ end }}'"
            echo "Discovered the go app running on ${url}. Making a curl call to the service's external ip"
            container(name: 'jnlp') {
              sh "curl --silent http://${url}"
            }
          }
        }
      }
    }
  }
}
If your not familiar with Jenkins, this is called a declarative pipeline and in it we have some groupings of commands that we want to Jenkins to run called stages that are hopefully pretty self explanatory based on the stage name. The agent configuration near the top of the file is where we are telling Jenkins to create an ephemeral pod that will be created when the buildjob runs. This pod will be created in Kubernetes namespace cicd which Ansible created for us and the pod that will be created during a run of the pipeline will consist of 4 containers - the 3 shown in the configuration above (buildah, helm, kubectl) as well as an implicitly-defined container that Jenkins creates for us automatically called jnlp which helps with connecting the pod to Jenkins.
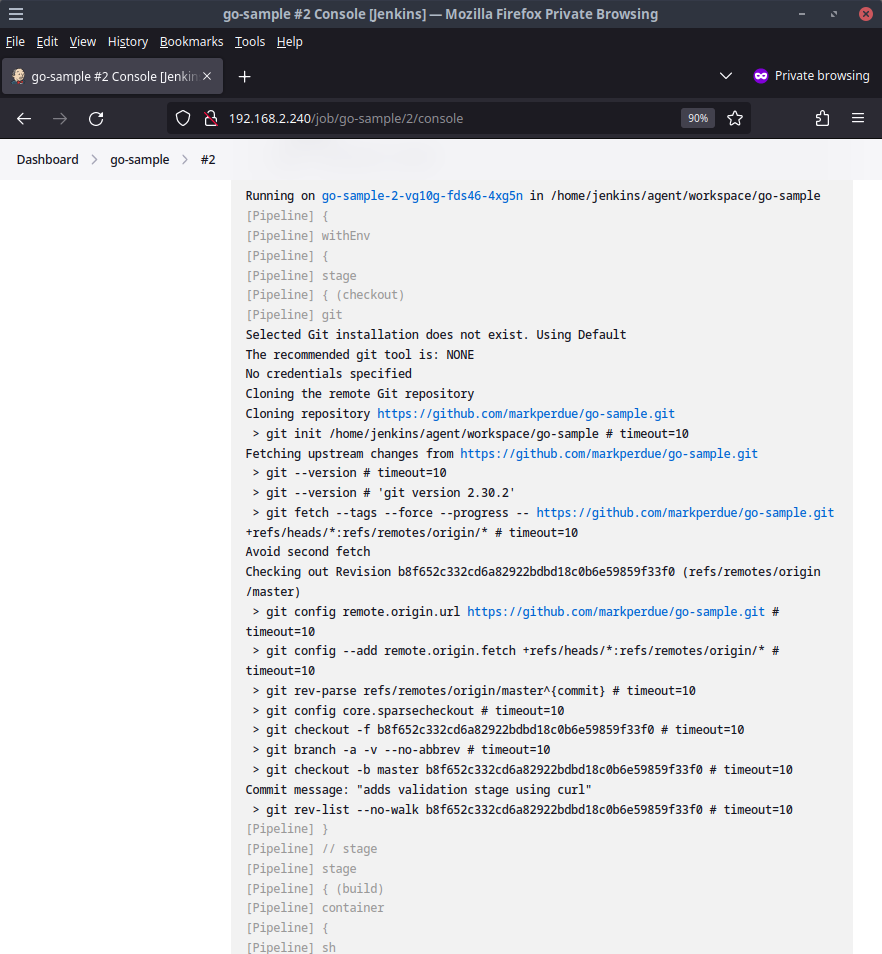
Click into the console output of the buildjob by clicking the #1 item and clicking Console Output which will show us what work Jenkins did.
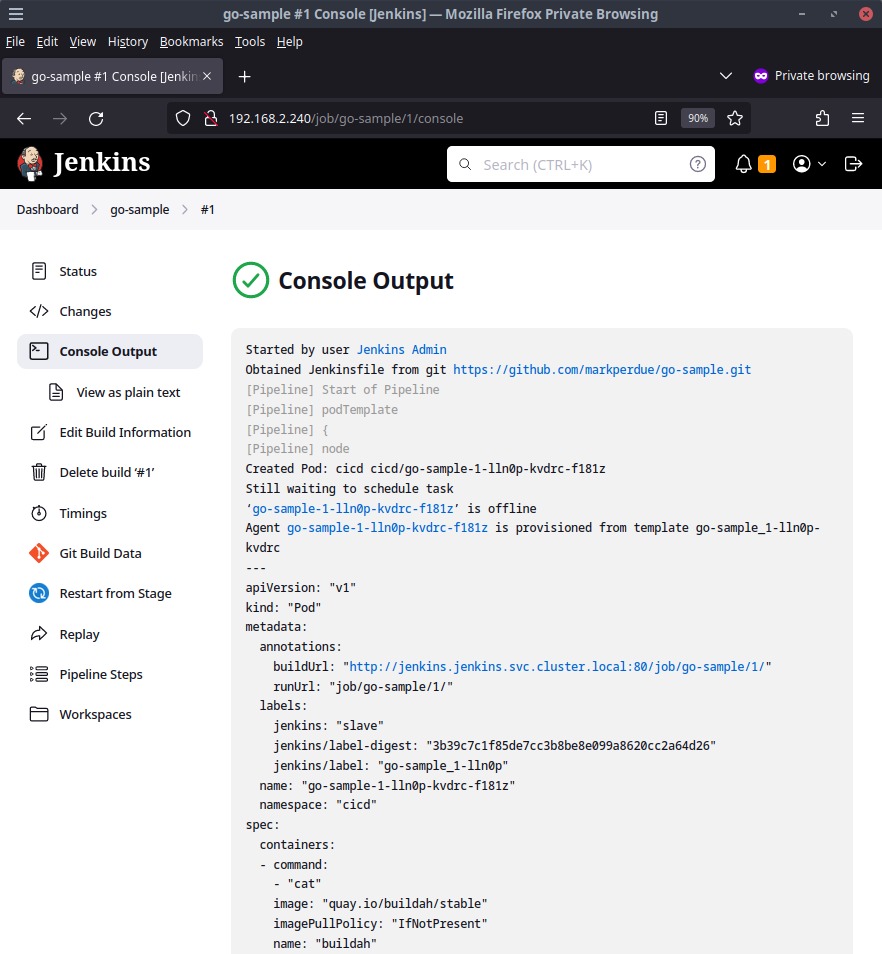
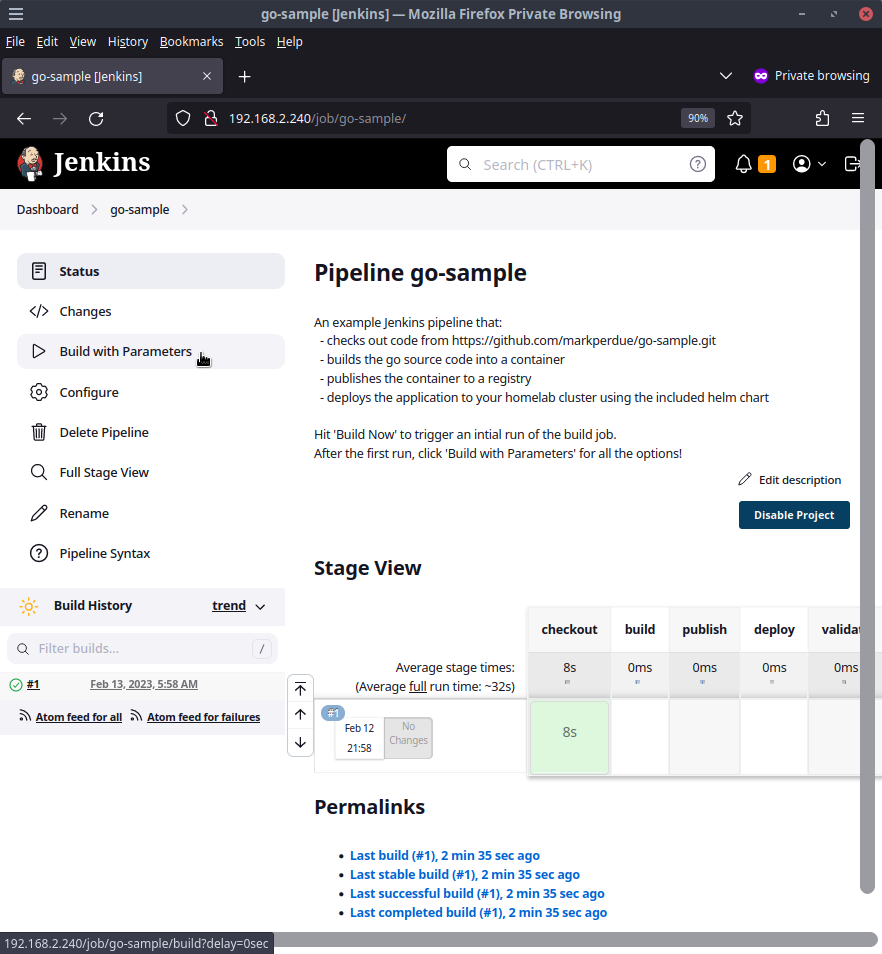
Not much happened in this first build as Jenkins did not yet know of some parameters that the pipeline defined. This is one of my biggest gripes with Jenkins pipelines of this stlye but it's an issue that only impacts the first run of the pipeline. Now that the first run is out of the way, subsequent runs of this pipeline will work as we expect. Let's give it another try by going back to the main buildjob page and clicking the link that now says Build with Parameters instead of Build Now.
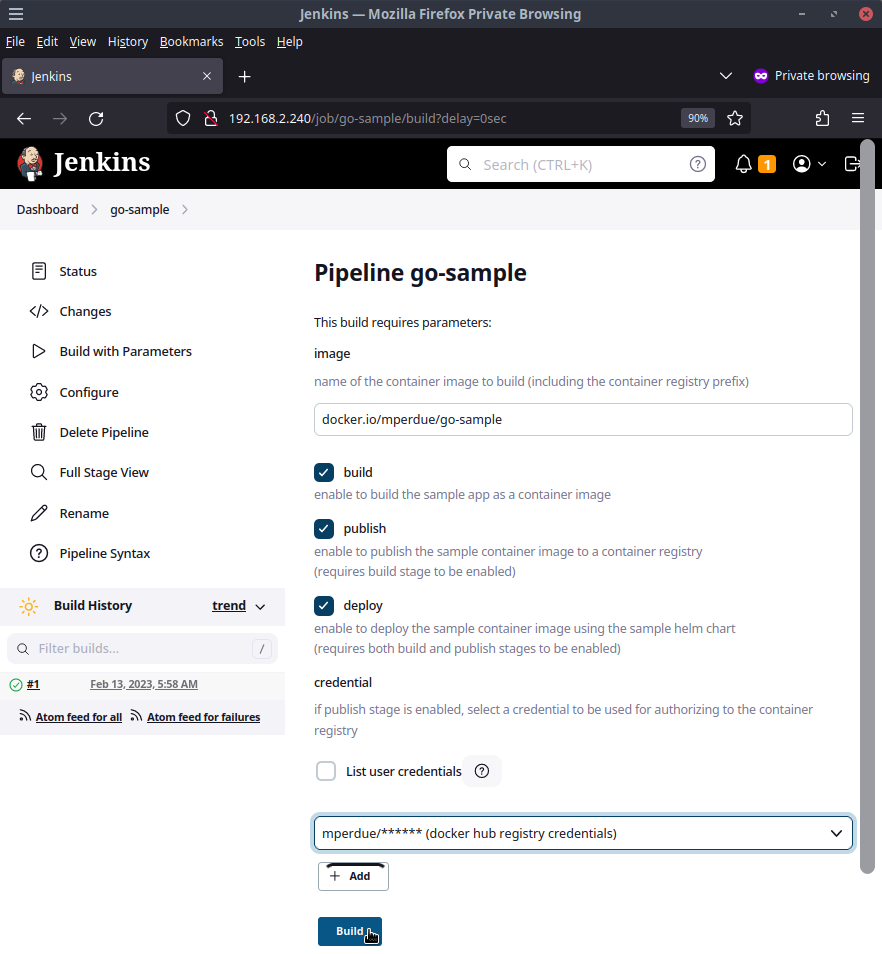
The first parameter this Jenkins pipeline accepts is the desired name of the container image we are going to build. If you are going to enable the publish step, you will want to change the image path to use your Docker Hub account name in place of mperdue. Feel free to replace go-sample with another value as well but it is not required.
Go ahead and check the boxes for build, publish, and deploy and from the dropdown, select the item that mentions docker hub registry credentials and then click Build.
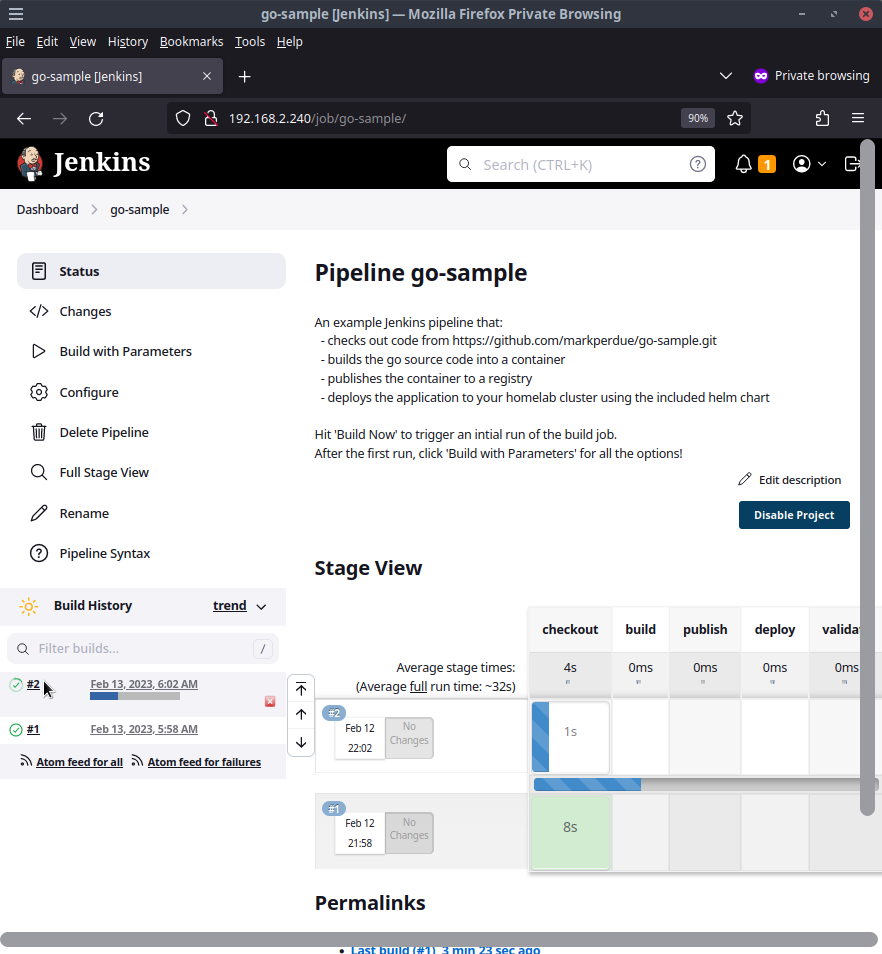
Now we're cooking. This time the pipeline will run through all the stages of the pipeline which we can watch in the console output.
The pipeline checks out the git repo with the sample go app https://github.com/markperdue/go-sample
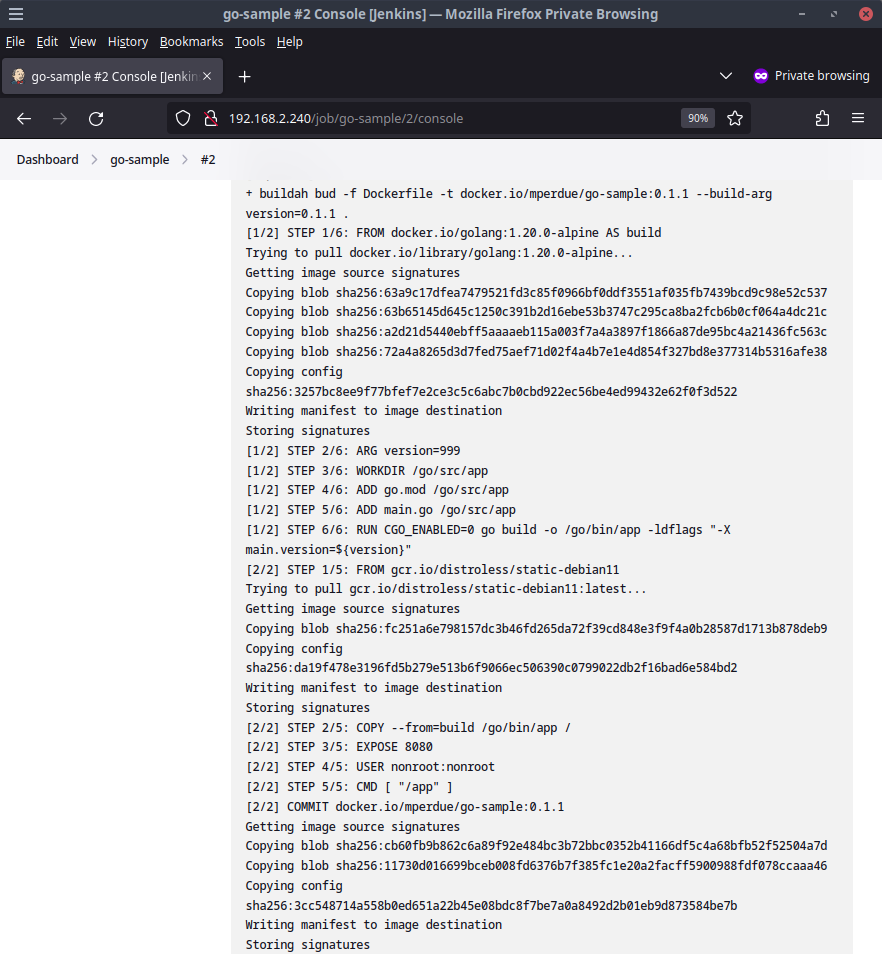
The pipeline then uses buildah to build a container using the Dockerfile within the git repo. As a demo of how the pipeline can pass in values to the contained build process, a build arg of version=0.1.1 is used.
The next stage is publishing the container to a container registry. If you did not provide valid credentials to docker hub earlier, this stage will fail as buildah will not be able to authenticate to docker hub. If you provided valid credentials, the pipeline should publish the container image.
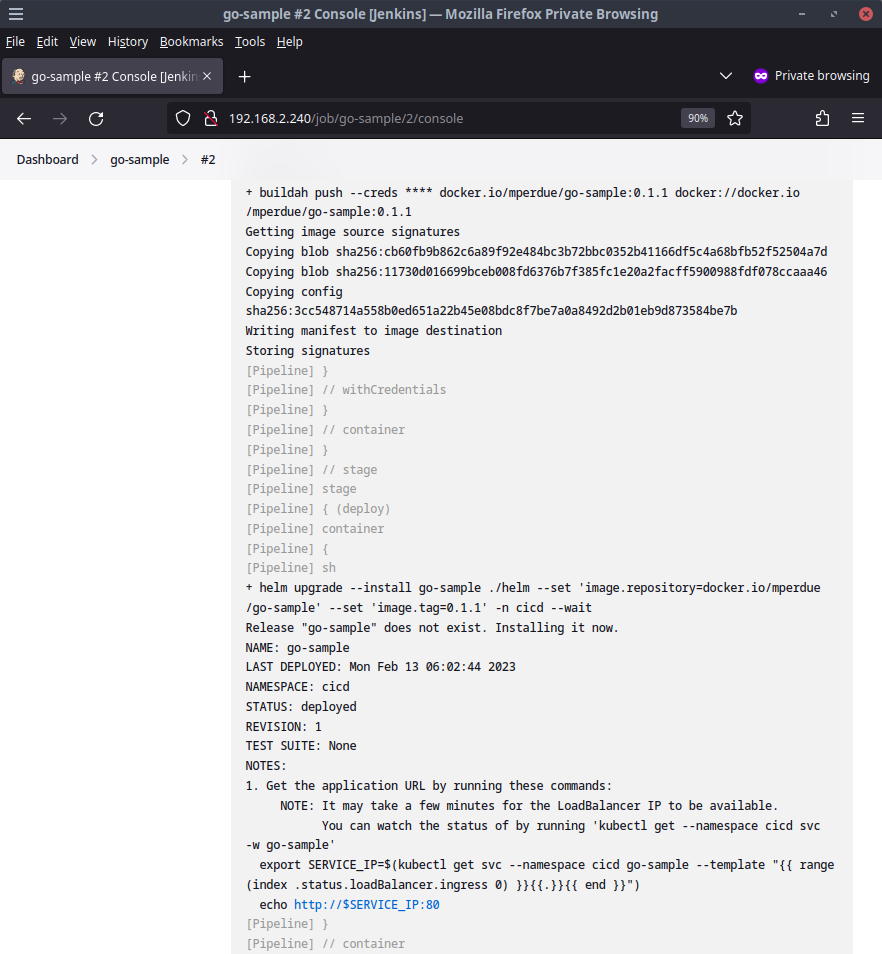
Now with the container image published, the pipeline uses helm to deploy the application using a helm chart included alongside the application source code.
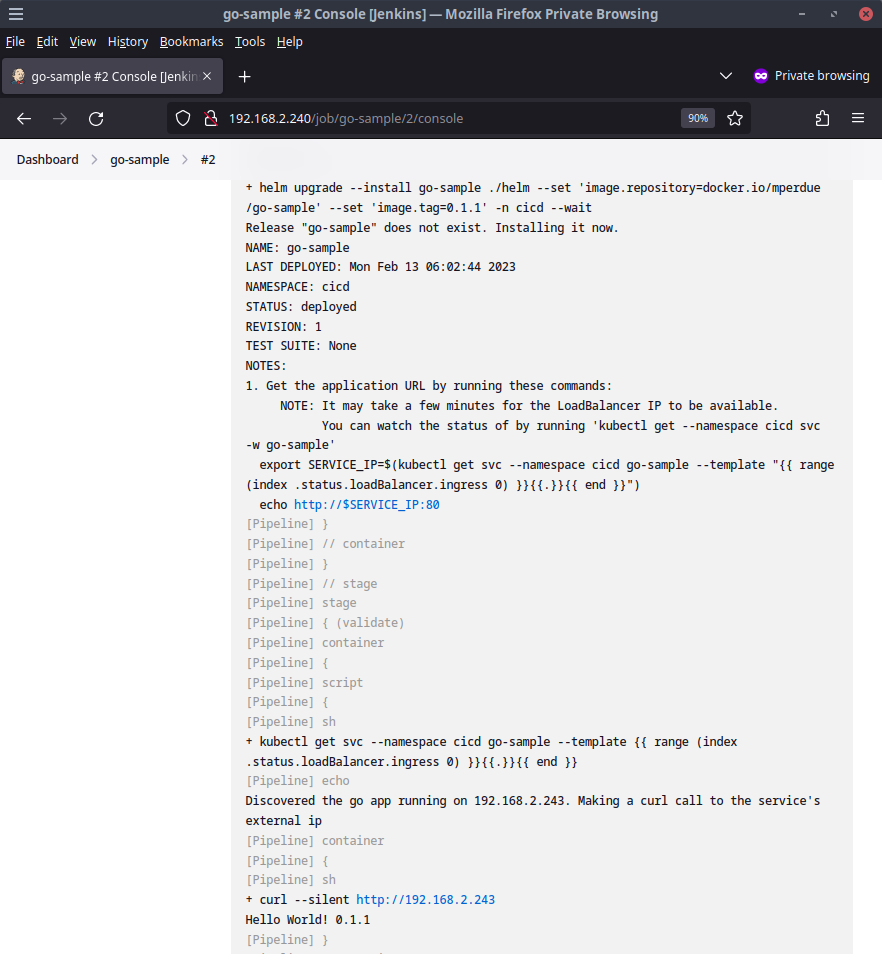
The go-sample application will get deployed to our Kubernetes cluster in the namespace cicd through the helm chart. The helm chart exposes the application with a LoadBalancer service in the same way we have used previously so we can use the pipeline to validate that our application is reachable by discovering the load balancer ip and making a curl call to the application endpoint
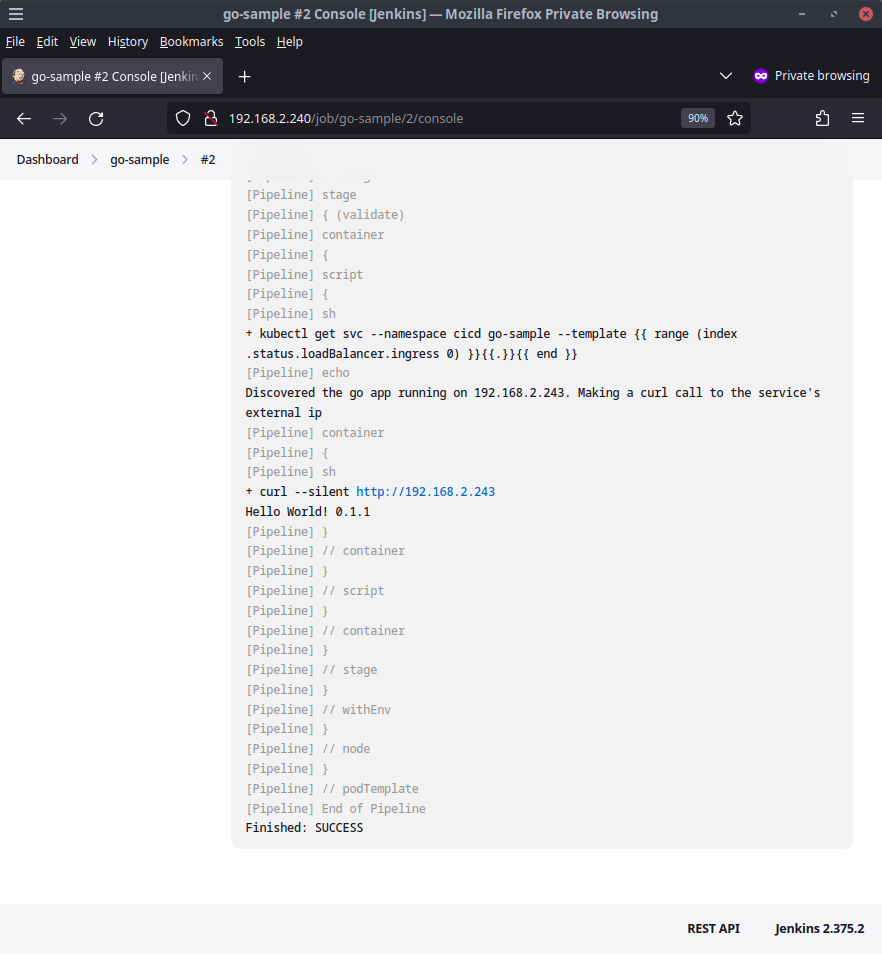
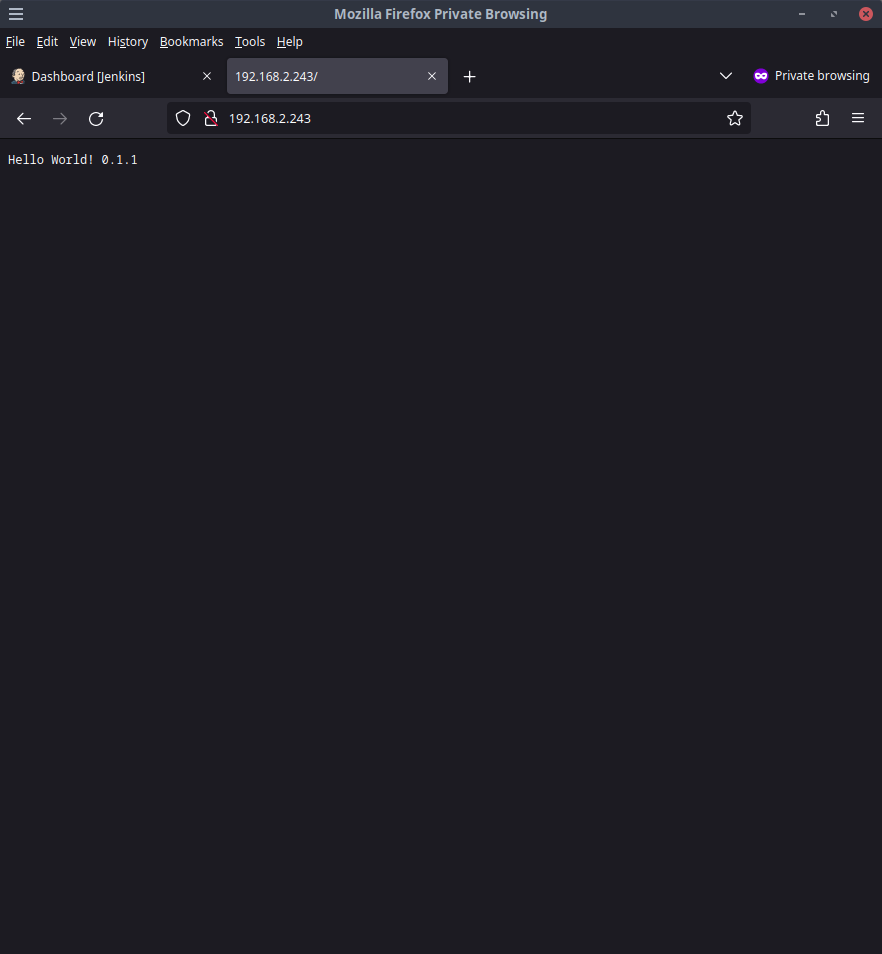
Nice! If the IP of the deployed application is the same as the buildjob picture above shows, our hello world app should be available at http://192.168.2.243
Wrap Up
So now we have a Jenkins instance built from code for our homelab. Yes! We even got a basic pipeline that can scale up our Jenkins workload on-demand that our Kubernetes instance handles without our intervention. Big yes!
If we follow this model out for other Jenkins workloads, you can see how flexible this can become if we needed to add other stages to our pipelines like static code analysis, container vulnerability scanning, api tests, and the like. We can just compose new containers into our pipeline pod template configuration in a very modular manner and continuously add new features to the pipeline.
With that, this series comes to an end. Hopefully this provided some value to you in improving your homelab setup to use infrastructure-as-code and config-as-code practices.
Bonus Content - Playbook In Detail?
The playbooks in the companion code repo abstract a lot away from what is going on behind the playbooks. In an effort to keep this guide concise, I have not included details of the playbook design. Let me know if you are interested in this content and I may write it up. Thanks!